GUM Applications
- For applications relying on GUM API, please refer to a different subset of guidance and documentation.
- For guidance around migrating your existing GUM group(s) refer to a later section in this article.
What is GUM?
GUM is PwC's portal for managing internal and external user accounts and groups. It enables registration, synchronization, and lifecycle management of users within the PwC Identity ecosystem, including integration with Entra ID.
GUM Portal
To manage users based on their environment, use the appropriate version of the GUM portal:
Access: All PwC users have access to these portals.
Reference Guide: To find out more about the GUM portal please refer to the following GUM Portal Documentation.
User Registration via GUM
Anyone in PwC with a valid PwC email can manage (add / update) external users using GUM. The subsections which follow provide guidance for using GUM to add external users individually or as part of a bulk operation.
PwC Managed User Registration
To register a PwC managed user, also known as a "trusted external user", please follow the steps listed below:
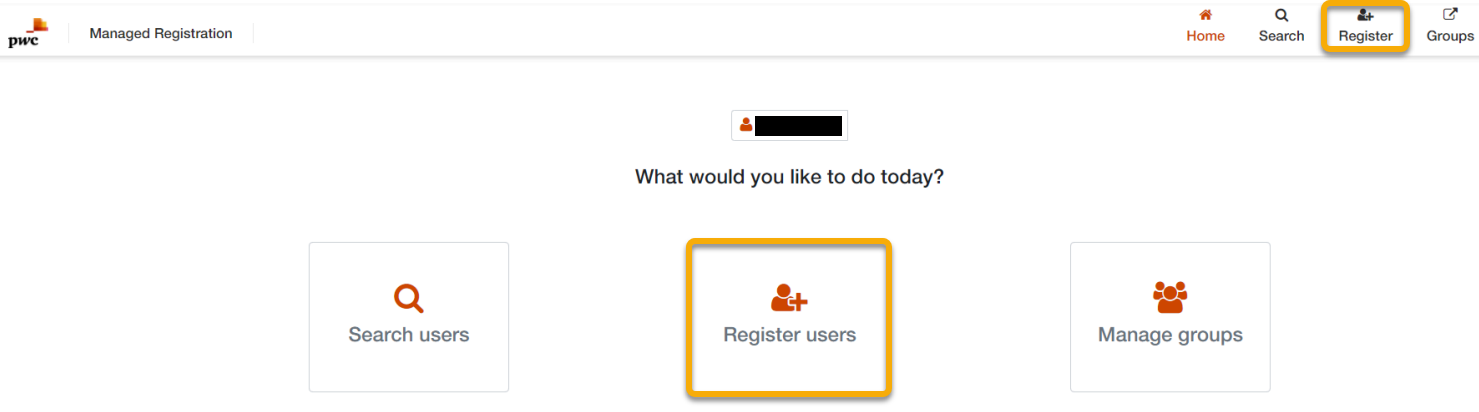
- From the GUM 2.0 main screen, click either Register users (Option A) or Register (Option B).
You may also register directly by using this link.
- Enter a valid email for the external user you are creating, then click
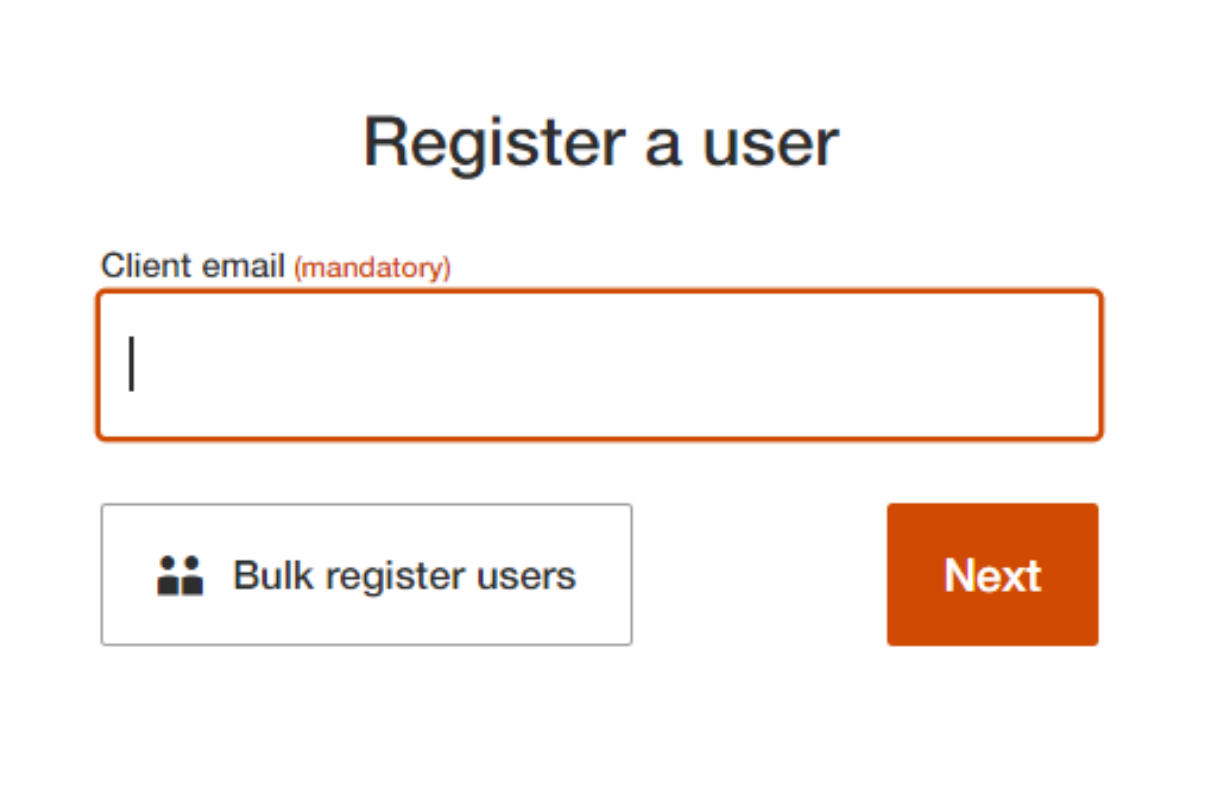
If the email address belongs to a PwC Managed User who has already been registered, the system will display:
- Email already exists
If the email address belongs to an existing user who joined via self-registration, the system will display:
- Email already exists. You can upgrade this user from self registered account status (IA1) to PwC trusted account status (IA2). Search and select user -> Click account status tab -> Upgrade user.
- Complete all fields. When you are finished, click
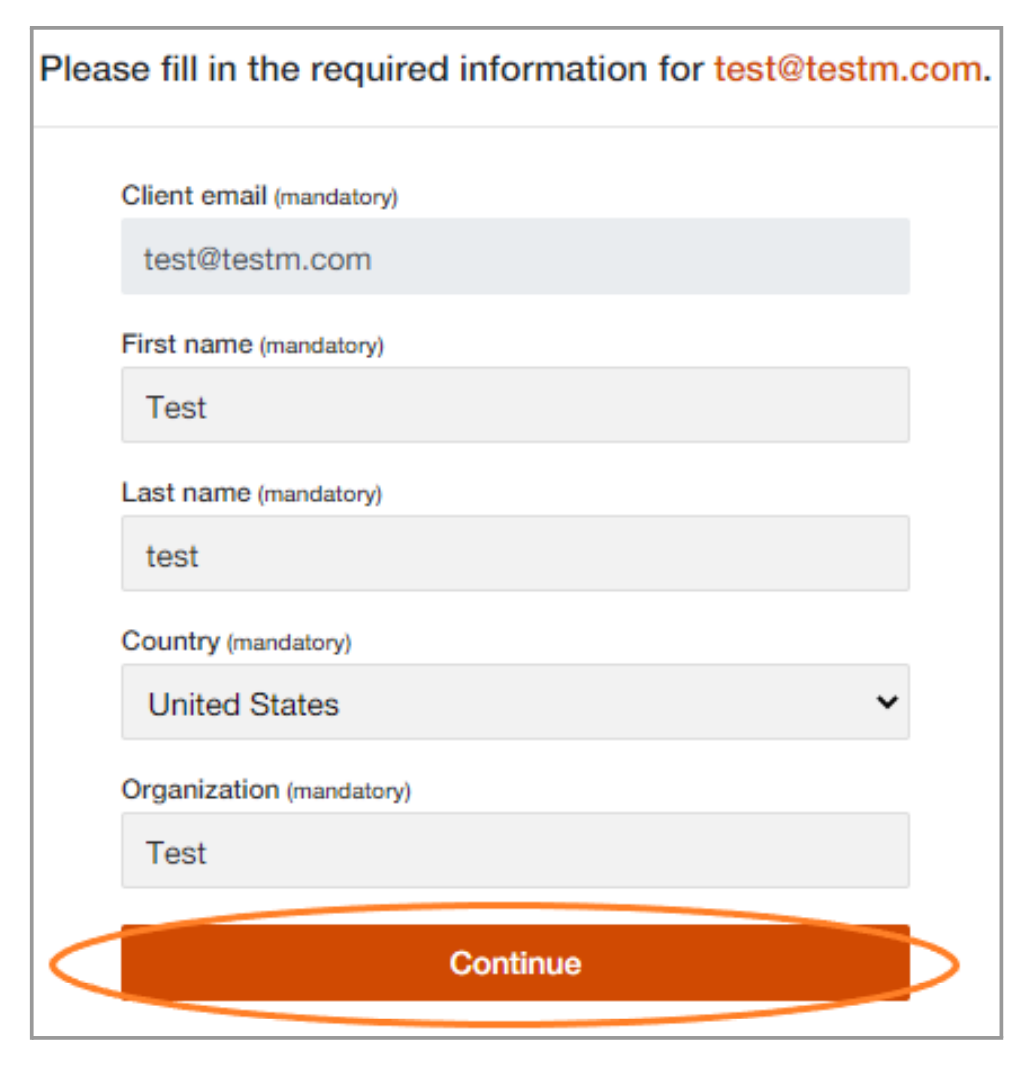
-
You can select the Default welcome
Email template(this can be changed to a custom email template if one exists for the application). -
You can also:
- Select a
Language,Country code, and enter aPhone numberfor the user. - Select a
Provisioning Dateandtime(GMT).
By default, theProvisioning Timesetting will be Immediately.
- Select a
-
Specify if this account was created for testing purposes by checking the
Is this a test account?box. -
When finished, click
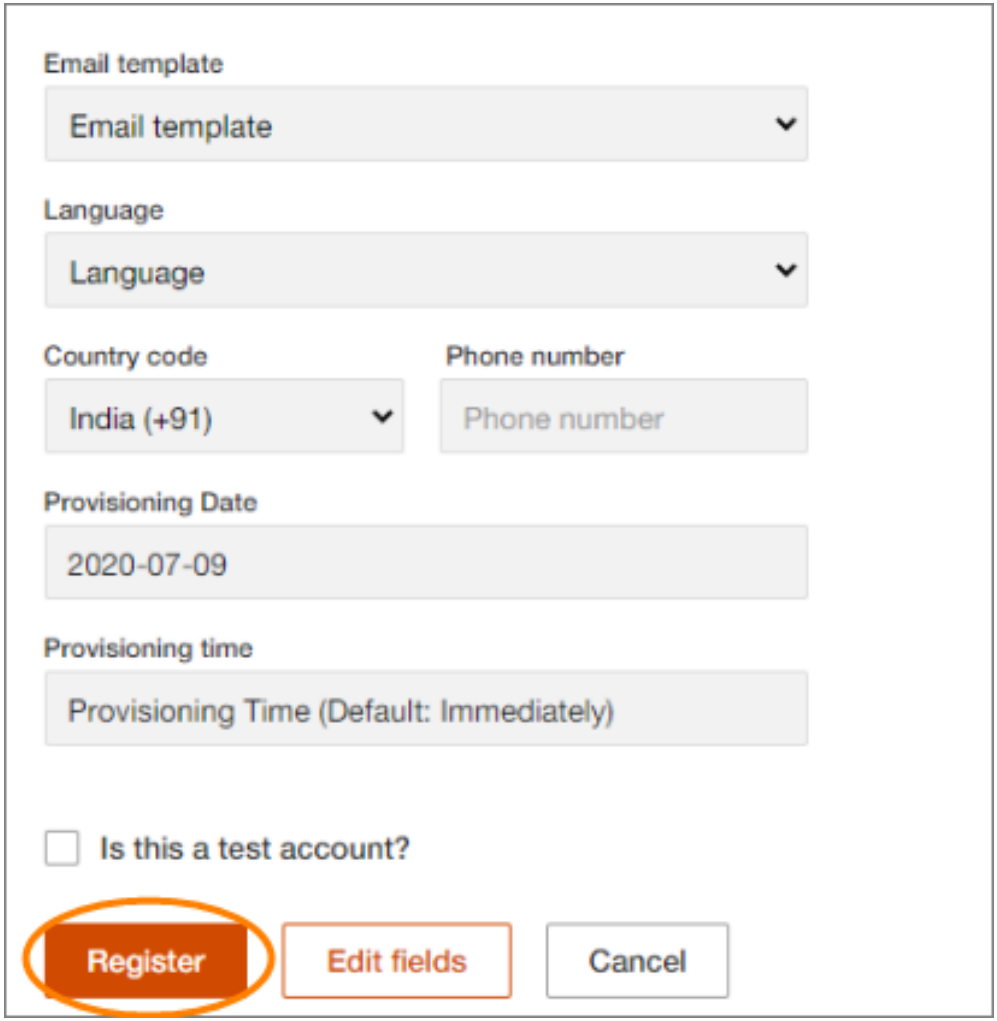
Please see the below dropdown for details about future provisioning dates, and the next section for bulk registration guidance.
📅 Optional - Setting a Future Date and Time for Notification
By default, external user registration is immediate. To register an individual external user that will be activated in the future, please follow the steps listed below.
-
At the Register Users screen, use the
Provisioning DateorProvisioning Timefields to defer notifications to your newly registered external user. -
If you set a future date in the
Provisioning Datefield, the user will be enabled on the future date and will receive their User ID and password on the specified date.
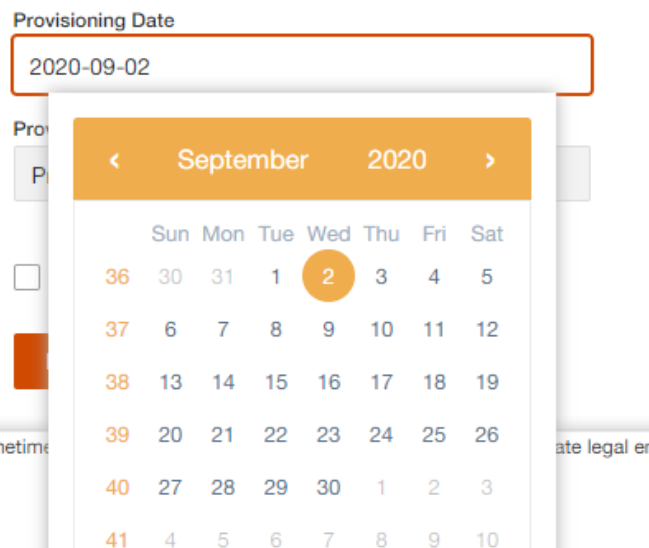
- You can also set a
Provisioning Timeif you want the user to receive their notification emails at a particular time of day.
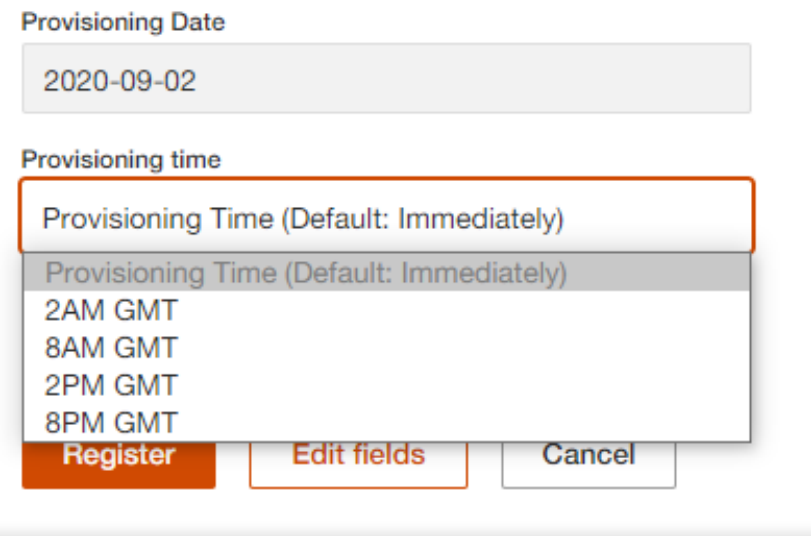
Please consider the following points when completing these optional fields:
- Enter a future date using the
YYYY-MM-DDformat. - Future-dated users are created at the time of registration, but do not receive notification until the date selected.
- If you enter a past or current date, the user will be created immediately.
- Enter future time as morning or afternoon
GMT.
External User Bulk Registration
The previous section described how to register a single external user. To register multiple external users using the Bulk Upload process, please follow the steps listed below:
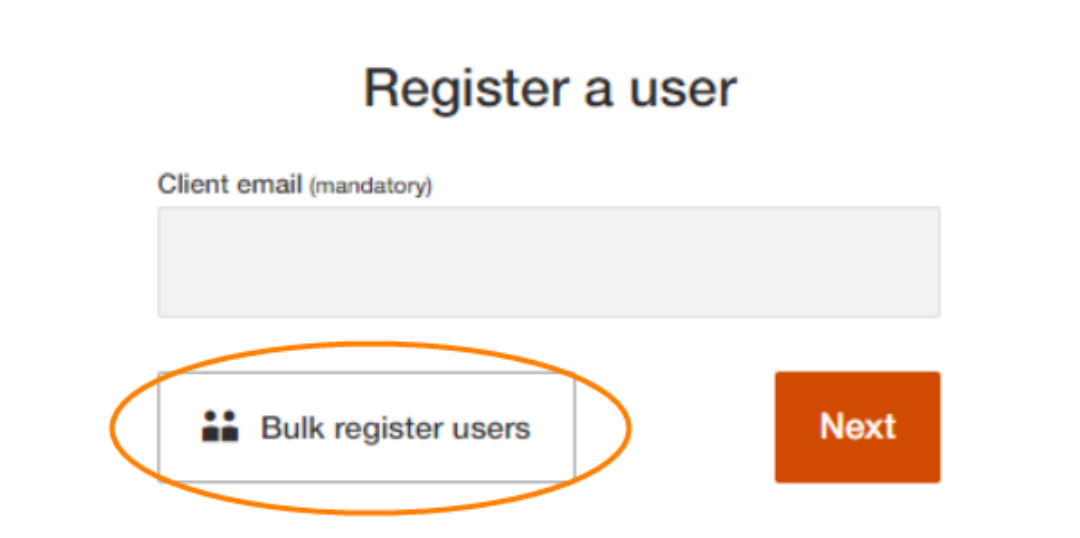
- From the
Register a userscreen, select the Bulk register users option:
- The Bulk Registration instructions screen will display:
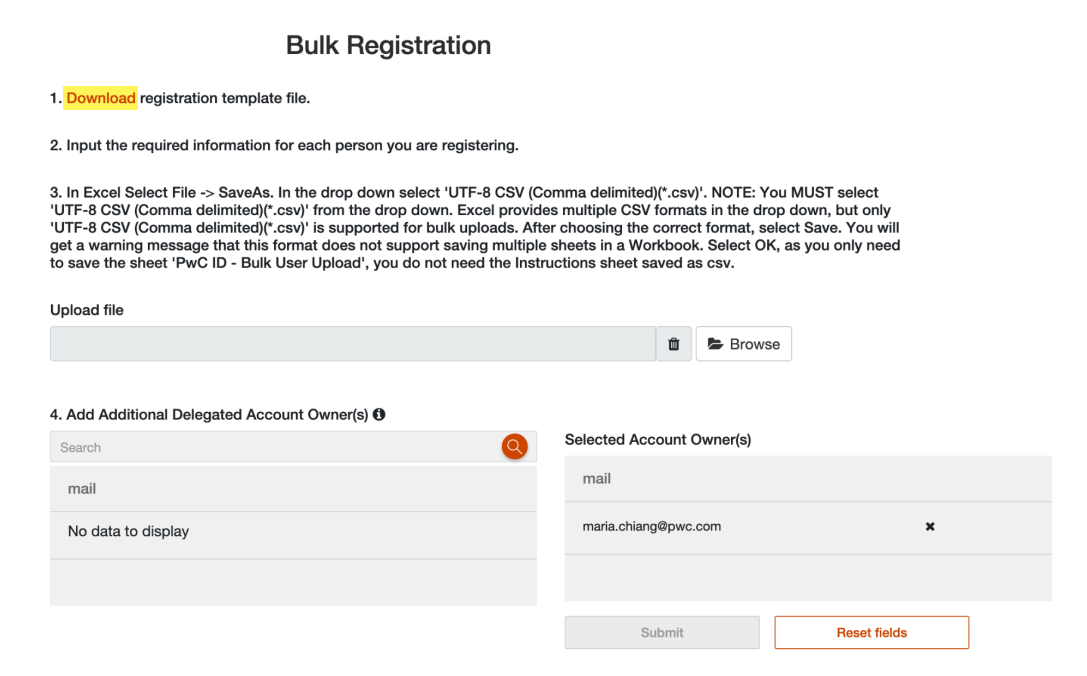
- Click the Download link to retrieve a Microsoft Excel spreadsheet on your local system.
Even if you have previously downloaded the sheet, download it again to ensure you have the latest version.
- After opening the Excel file, review the detailed instructions in Tab 1 about how to enter data.
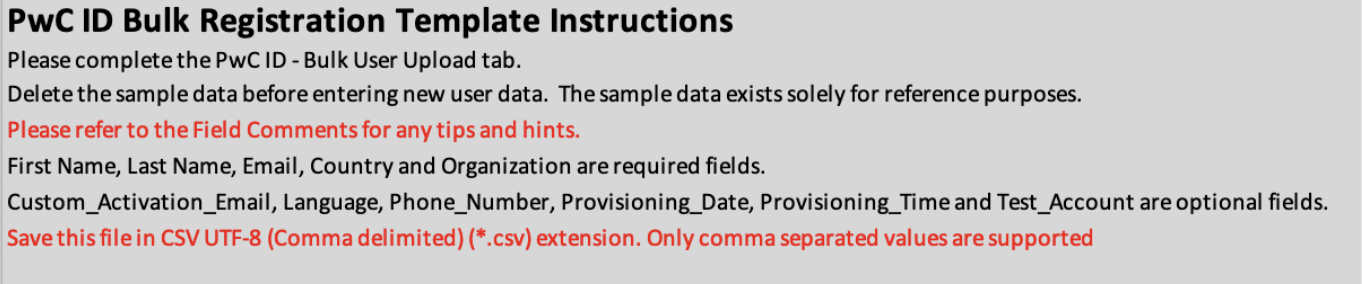
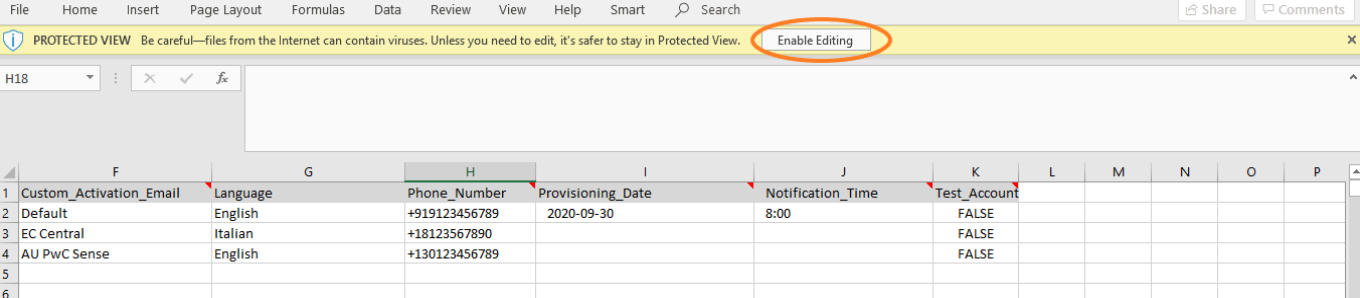
- In the second tab, click
Enable Editingto delete the example data and add data for users you wish to register. Please refer to the field comments for tips and hints.
- When finished, click
Save Asand selectCSV UTF-8 (comma delimited *.csv)in the Save as type/ File Format field:
Windows Users:

Mac Users:
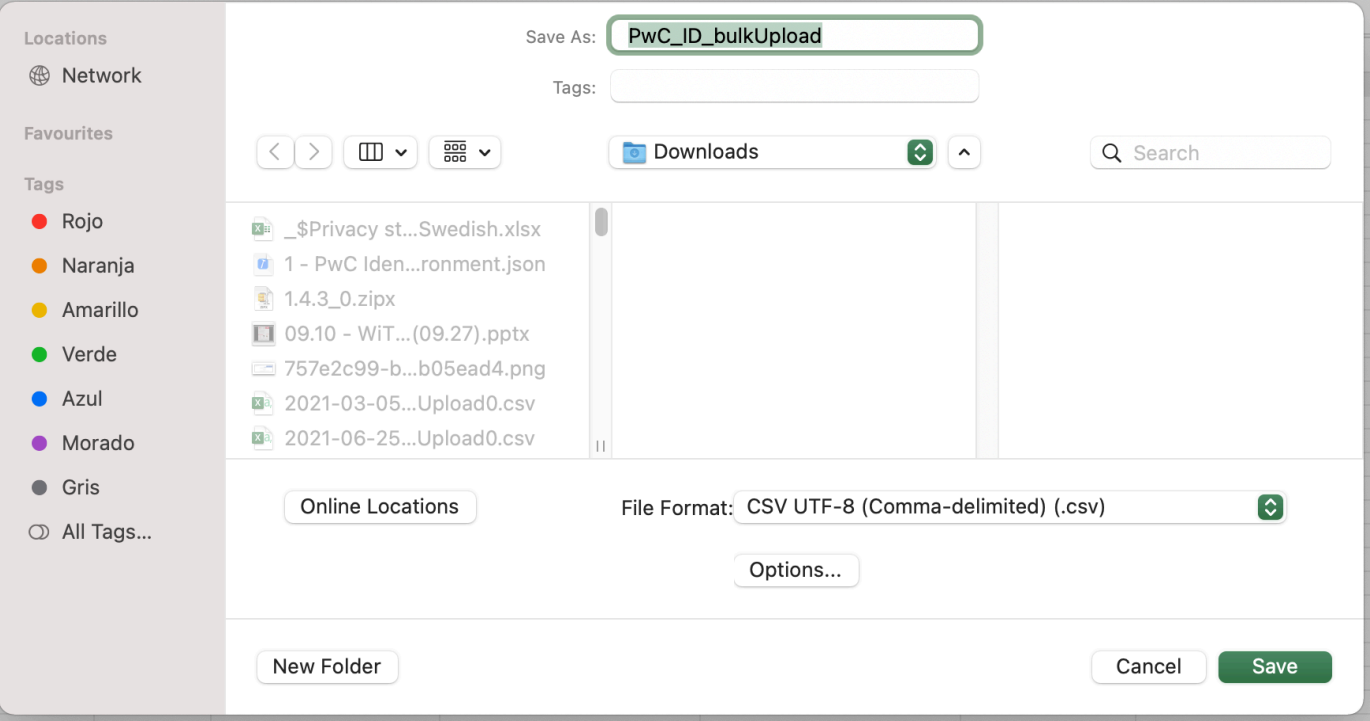
Excel offers several CSV formats. You MUST select CSV UTF-8 (Comma delimited) (*.csv) or the bulk load will fail.
- Click Browse and select the updated file (i.e., the file with the
.csvextension).

- After uploading the file, you can add Additional Delegated Account Owner(s) by their email addresses or Global User IDs (GUIDs). The user performing this action will be added by default.
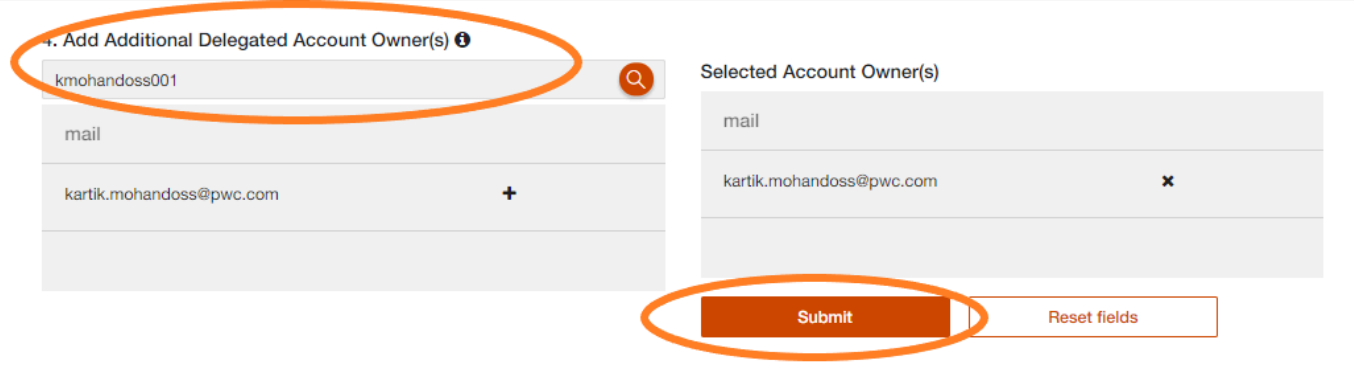
- Click to complete the bulk registration process.
Bulk uploads are processed every four hours starting at
00-00-00 GMT.
- After the creation of the external user accounts, you will receive the following confirmation email:
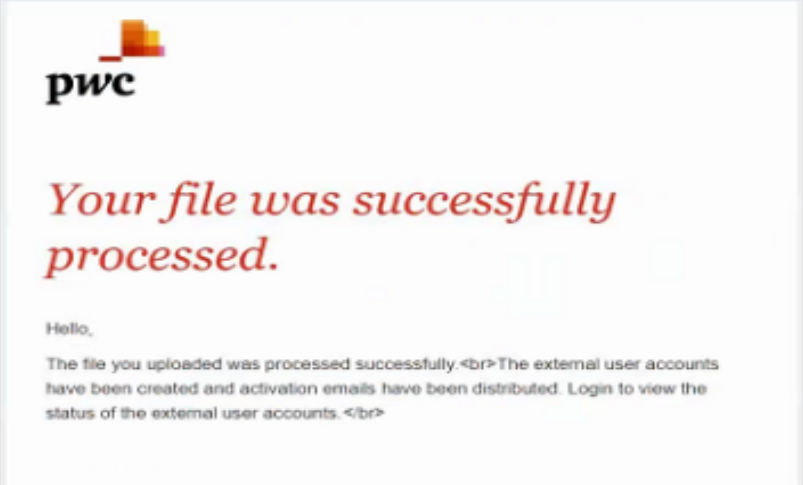
Users included in the bulk registration file will receive an email with a link to activate their account.
Other Potential Outcomes
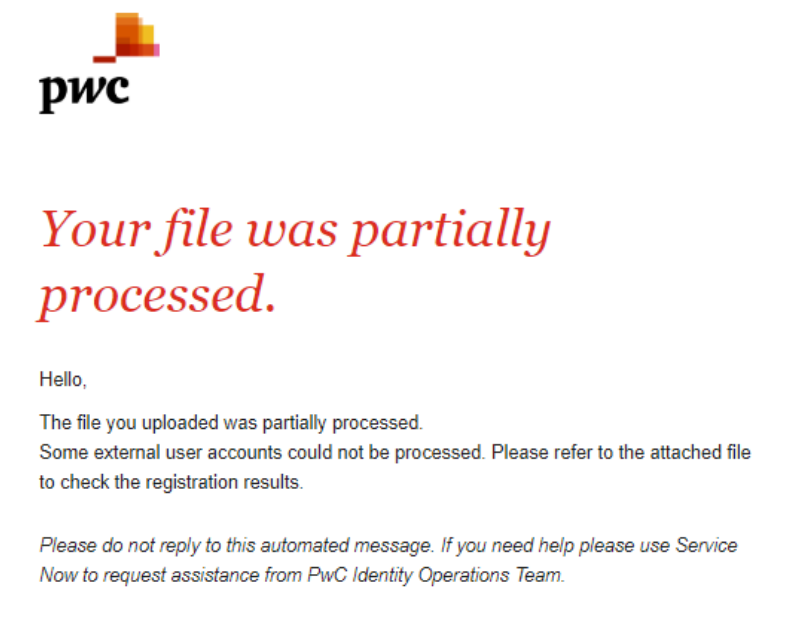
In case of user creation failure, the uploader will receive an email notification with an attachment containing an explanation of the failure:
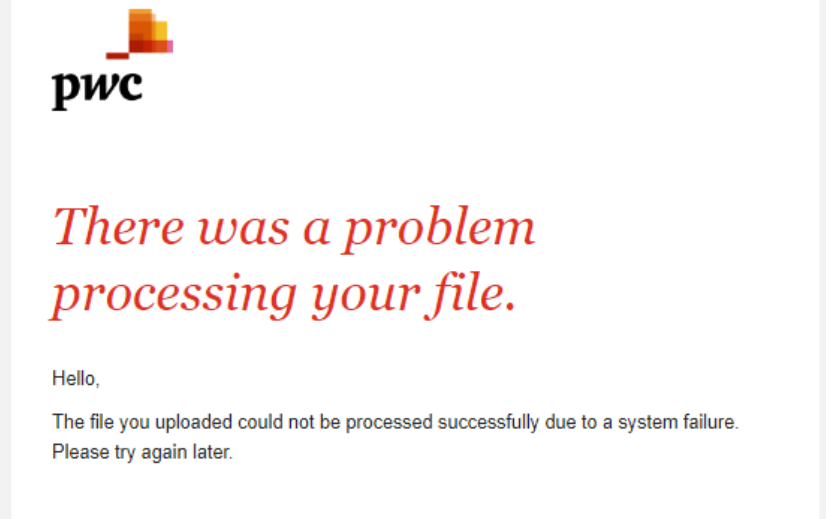
If you receive the following message, please try again to upload the file.
Migration of GUM Groups
If you have an existing GUM group, you can choose one of the following options to migrate it to Entra ID:
Sync Using GUMApplicable for: Internal Groups Only
After completion: Group management still carried out through GUM portal until a later date, but satisfies initial migration prerequisites for moving to Entra ID.
Create / Migrate the GUM Group to Entra IDApplicable for: Internal / External Groups
After completion: Migrated group(s) will be managed exclusively via Entra ID.
Option 1: Sync Using GUM
With this approach, if your existing GUM group meets the requirements below, you can synchronize it with Entra ID in order to move forward with your application's migration to Entra ID.
This option will only create the group in Entra ID; however, the group must continue to be managed through the GUM portal.
While synced groups cannot currently be managed via Entra ID, the Engineering team is currently developing a solution that will allow existing synced groups to be converted into cloud-only groups.
Once this feature becomes available, you will be able to request the conversion of your existing synced groups to cloud-only groups. Until then, please continue to manage your group via the GUM portal.
- ✅ Available for internal groups only
- ✅ Group must not contain any disabled users.
- ✅ Group name cannot exceed 64 characters
- From the GUM Portal home page, click either the Manage groups tile or Groups option from the top navbar:
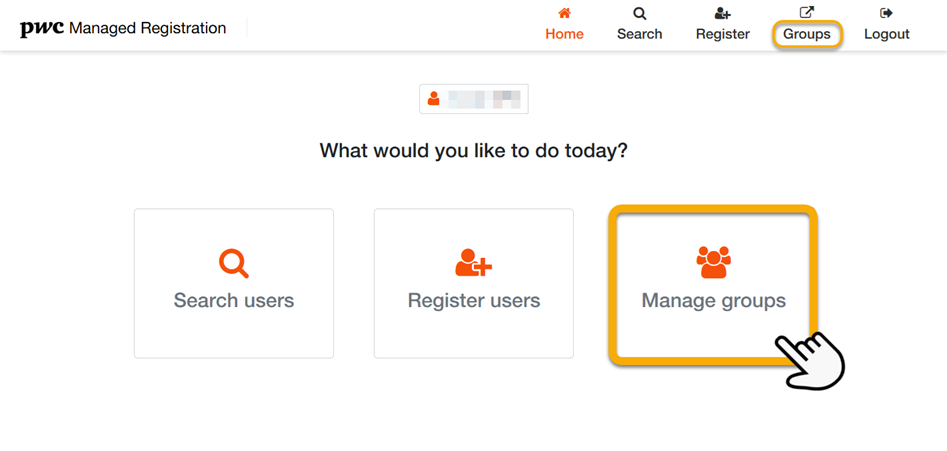
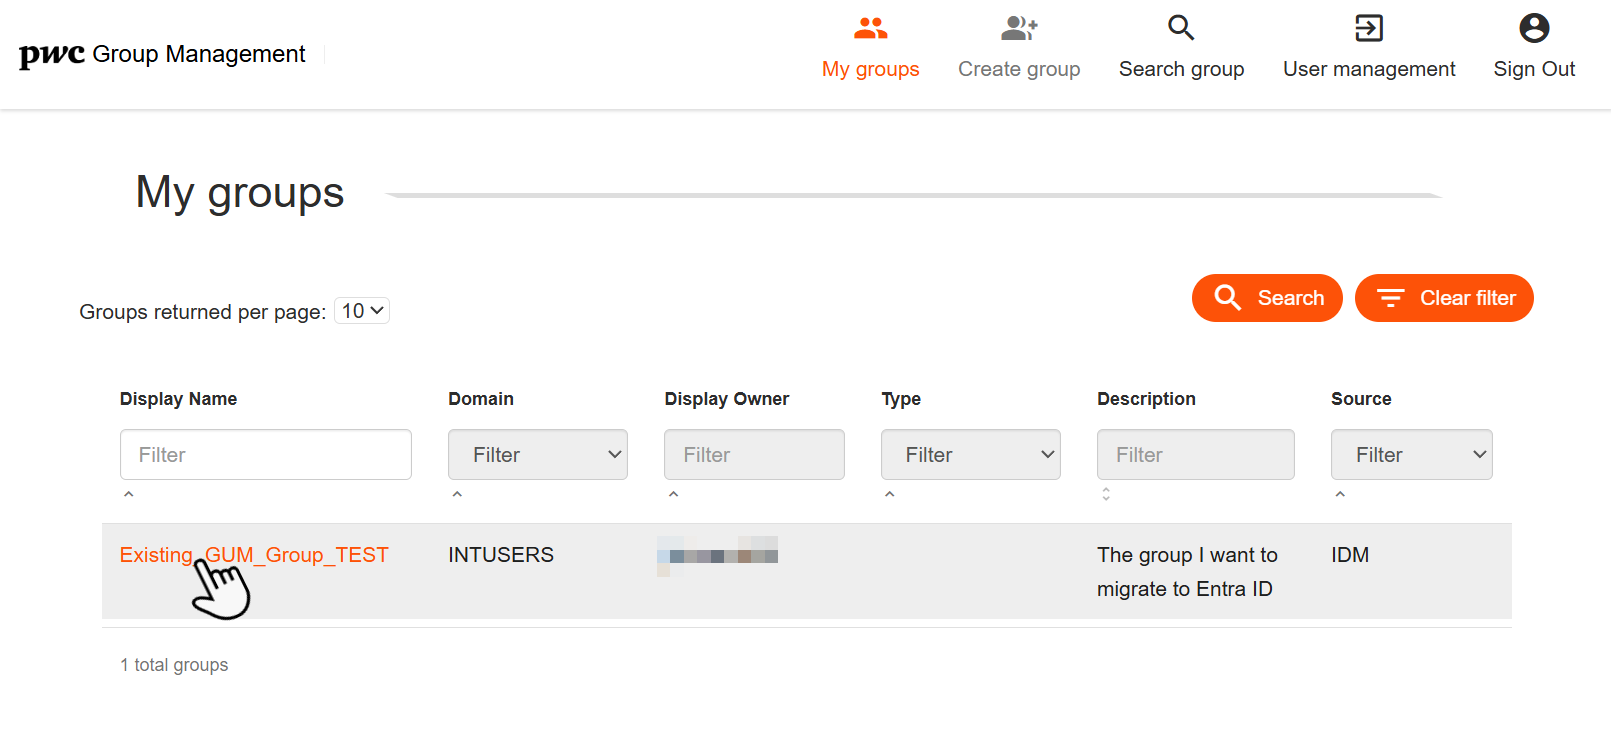
- From the list of available group options, find and click on the group you want to synchronize with Entra ID:
-
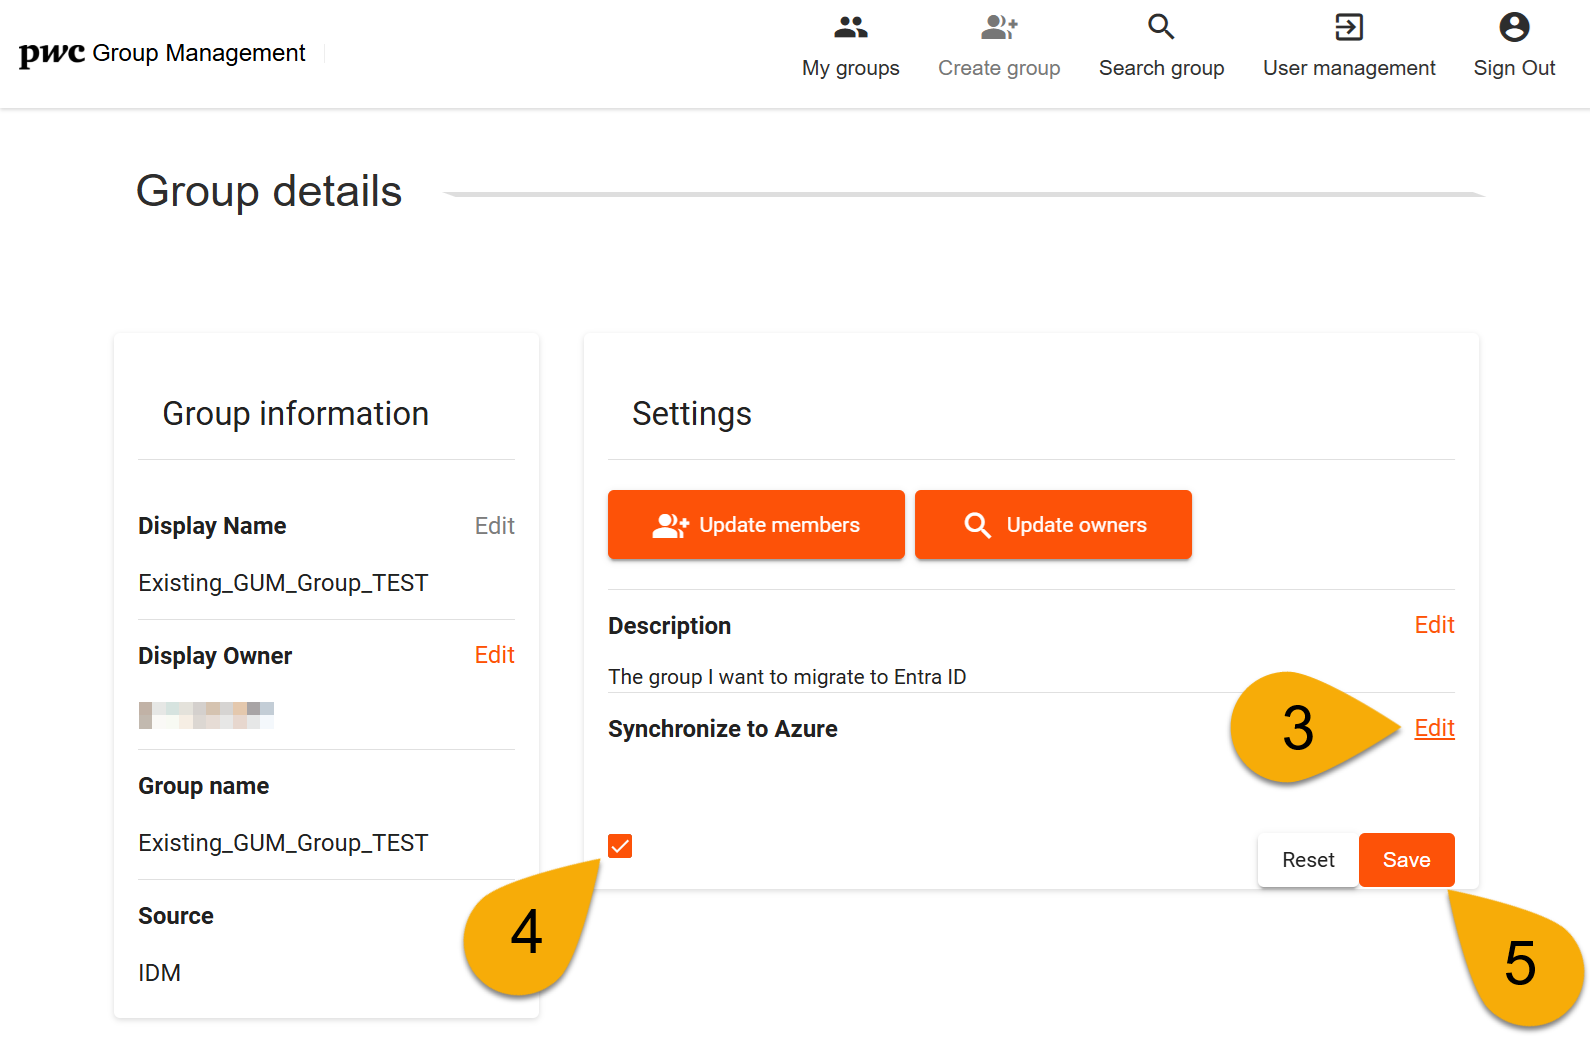
From the group details page, find the Synchronize to Azure option and click its corresponding
editbutton. -
Select the Checkbox ✅
-
Click
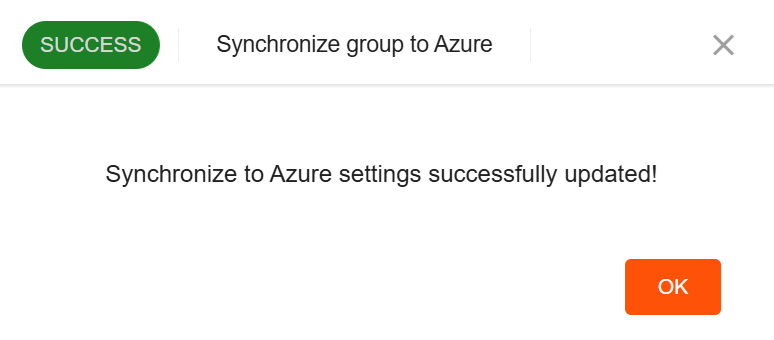
- If successful, click OK to close the confirmation window:
The sync will fail if the group has any disabled users in it or group name exceeds 64 characters.
Still having issues with this process? Raise a troubleshooting ticket to the migration team.
For the Short Description, please specify
Group Sync Assistance
Verify if the same group(s) you synced in the GUM portal now exist in Entra ID. If not, follow the above troubleshooting steps.
Option 2: Create or Migrate GUM Group to Entra ID
This approach provides an immediate mechanism for group management in Entra ID.
Create new group(s) directly in Entra ID
Follow the self-service process to create the group(s) in Entra ID.
When finished, raise a ticket to the migration team to disable the GUM group(s) you created.
For the Short Description, please specify:
Disable GUM group (migrated to Entra ID)
Request to migrate existing GUM groups
Raise a ticket to the migration team requesting the migration of your existing GUM group(s) to Entra ID.
For the Short Description, please specify:
Migrate existing GUM group to Entra ID, and list the group(s) to be synced from GUM to Entra.
The corresponding GUM group(s) will be disabled once migration is complete.
Currently, migration or creation must be performed manually by extracting the GUM object and running a script to create the Entra ID group. Current manual process may take at least a week to migrate the group.
- The Engineering team is actively developing a GUI-based solution to simplify this migration process in the future.
Going forward:
The migrated group(s) will be managed exclusively via Entra ID following the guidance in this article.