Client Secrets & Certificates Guide
> In Entra ID
In Entra ID, applications and Service Principle Names (SPNs) use client secrets and certificates for authentication and token validation. Managing client secrets and certificates in Entra can be self-managed by application owners.
This guide provides application owners with a step-by-step process to create or renew the client secret and signing certificates.
Please review the IDaaS Technical Migration Guide for details on authentication grants and token signing.
Create or renew an OAuth client secret
Follow these steps to create or renew an OAuth client secret in Entra ID.
To make the following changes, you should be listed as the application owner.
-
Log in to the Azure Portal (Stage / Prod) with your admin account.
-
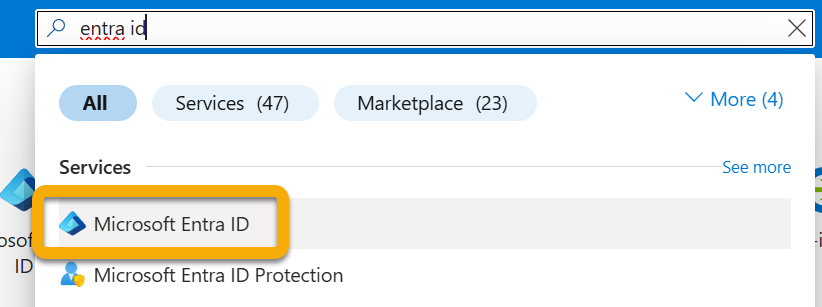
In the Search field, search for Entra ID and select Microsoft Entra ID.
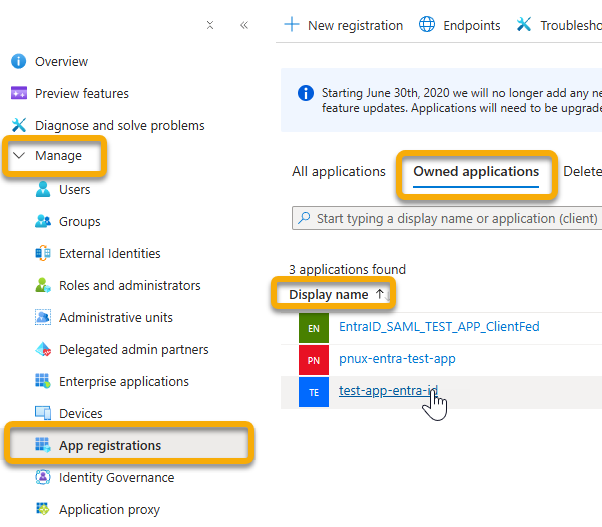
- From the left-hand pane, select App registrations and select the Owned applications tab. Next, under Display name, select the application for which you want to update the client certificate.
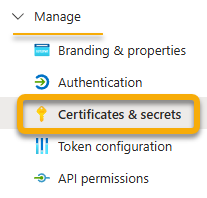
- From the left-hand pane, select Certificates & secrets.
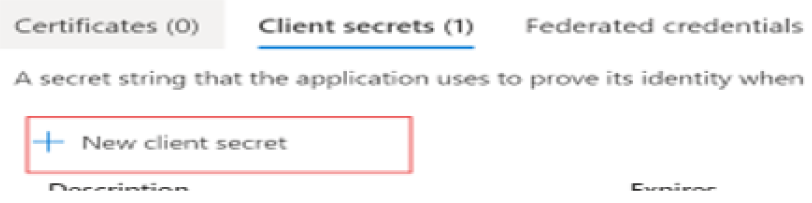
- Select New client secret.
- Enter a description of the secret and select an expiration date of 12 months from the drop-down menu per NIS security guidelines. Click Add.
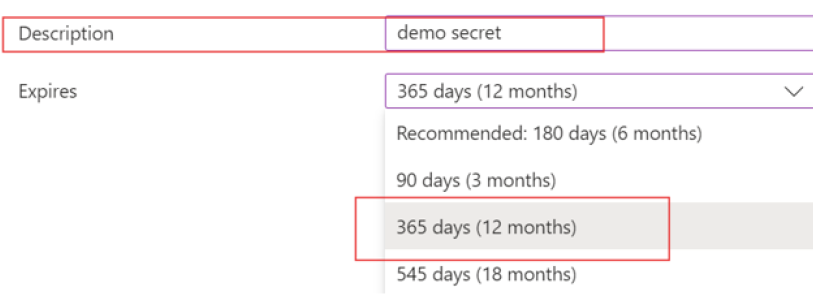
- After you have saved the client secret, the value of the client secret is displayed. This information is only displayed once, so copy this value and store it where your application can retrieve it, usually where your application keeps values like
clientId, orauthorityin the source code.
To sign in as the application, enter the secret value and the application's client ID.

- Import the secrets on your application code and test the application's functionality.
Create or renew a SAML signing certificate
The SAML signing certificate on Entra ID configures a certificate to expire three years from the date you create it. To create or renew a SAML signing certificate, please follow the steps listed below.
To make the following changes, you should be listed as the application owner.
-
Log in to the Azure Portal (Stage / Prod) with your admin account.
-
In the Search field, search for Entra ID and select Microsoft Entra ID.
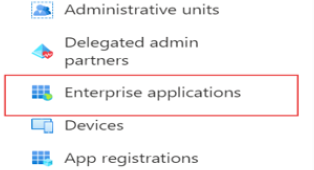
- Below the Manage section on the left-hand pane, select Enterprise applications.
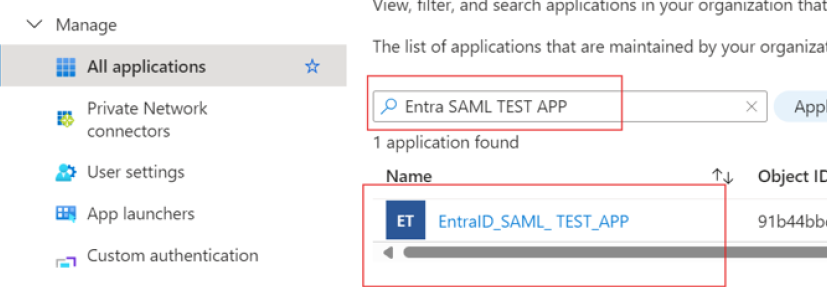
- Enter the name of the existing application in the search field, and then select the application from the search results.
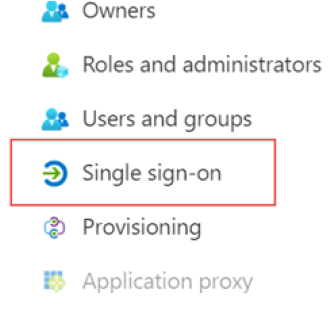
- Below the Manage section on the left-hand pane, select Single sign-on.
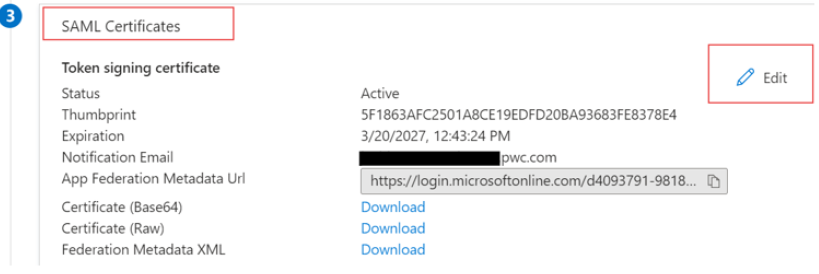
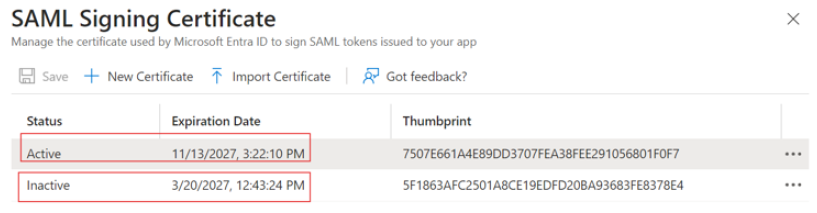
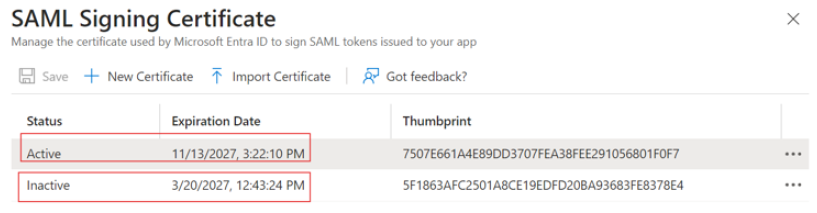
- In the Set up Single Sign-On with SAML page, find the SAML Signing Certificate heading, and click the Edit icon (✏️). The SAML Signing Certificate page appears, which displays the status (Active or Inactive), expiration date, and thumbprint (a hash string) of each certificate.
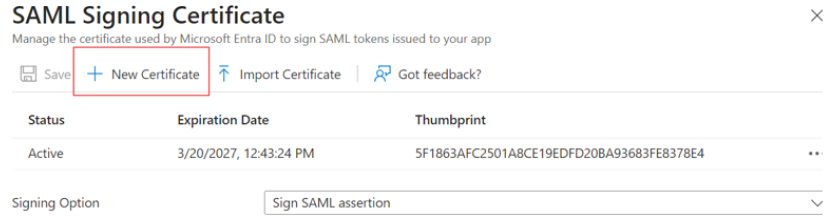
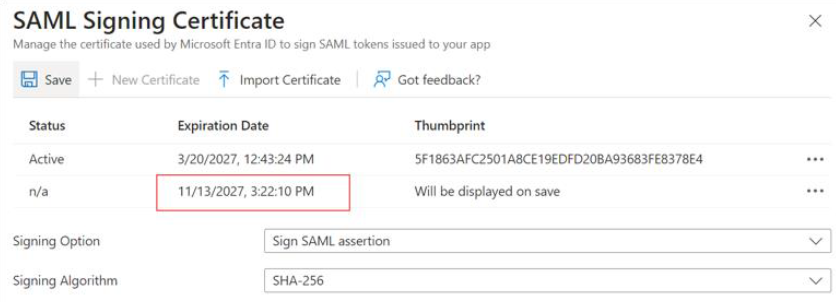
- Select New Certificate. A new row appears below the certificate list, where the expiration date defaults to exactly three years after the current date.
Because our changes are not yet saved, you may modify the expiration date.
- In the new certificate row, hover over the Expiration Date column. A calendar control (📅) appears, displaying the days of a month of the new certificate expiration date.
- You can set any date between the current date and three years after the current date. Click Save.
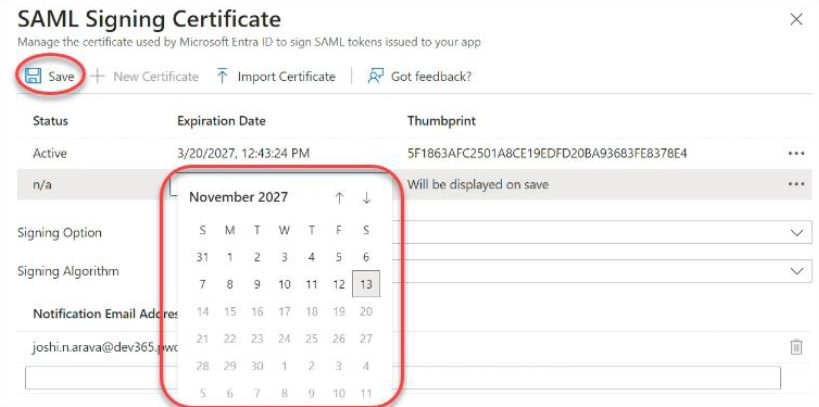
- The new certificate displays with a status of Inactive, the expiration date that you chose, and a thumbprint.
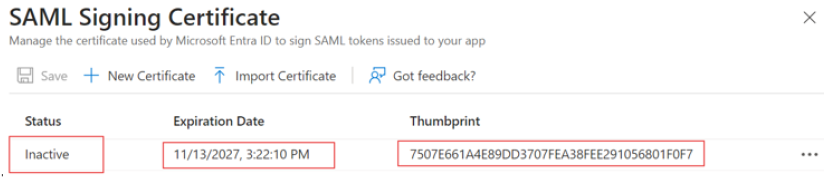
- Download the new certificate in the desired format for your application and upload your application.
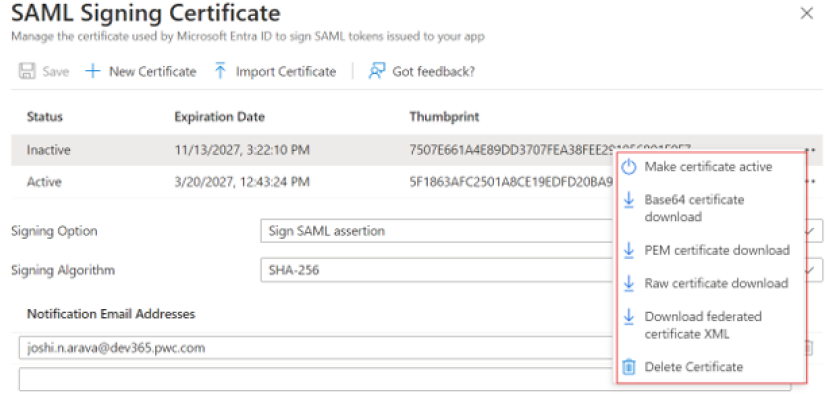
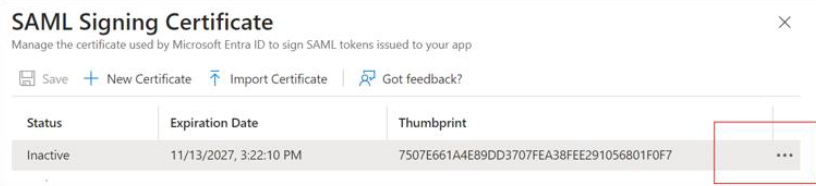
- To make the new certificate active in Microsoft Entra ID and roll over to the new certificate, return to the SAML Signing Certificate page. In the newly saved certificate row, click the ellipsis (
...) and select Make certificate active.
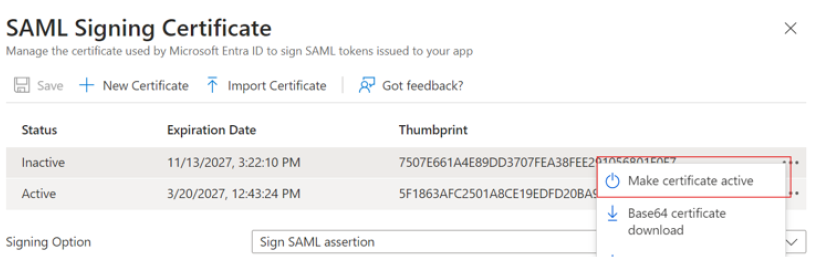
- The status of the new certificate will change to Active, and the previously active certificate will change to a status of Inactive.
- Test the application's functionality.
Create or renew an OAuth client certificate
The Microsoft Identity platform also allows the calling service to authenticate using a certificate instead of a shared secret.
Because the application's own credentials are being used, these credentials must be kept safe. Never publish that credential in your source code, embed it in web pages, or use it in a widely distributed native application.
If your application is using an OAuth client certificate instead of client secrets, please follow the steps listed below to upload the new certificate on Entra ID:
To make the following changes, you should be listed as the application owner.
-
Log in to the Azure Portal (Stage / Prod) with your admin account.
-
In the Search field, search for Entra ID and select Microsoft Entra ID.
- From the left-hand pane, select App registrations and select the Owned applications tab. Next, under Display name, select the application for which you want to update the client certificate.
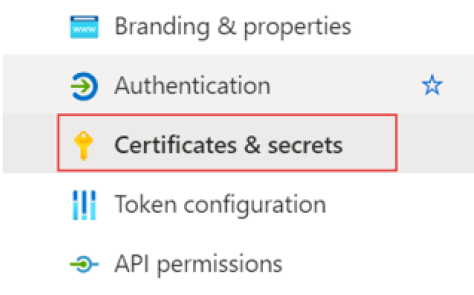
- From the left-hand pane, select Certificates & secrets.
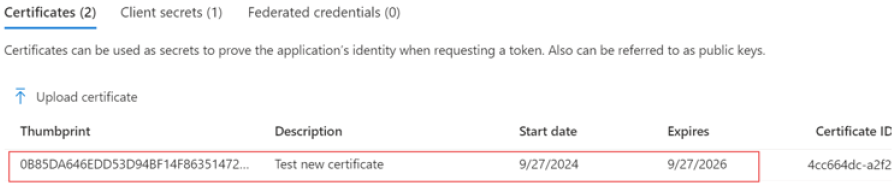
- Select the Certificates tab and click Upload certificate.

- Complete the Description field, browse the new certificate and click Add.
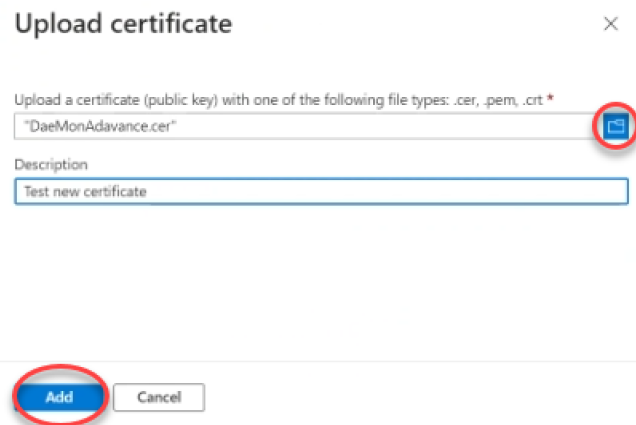
- The new certificate will be added to the Entra ID portal.
-
Upload the private key to the application code and test the application's functionality.
-
If you have questions, please raise a ticket using the SNow Application Integration Troubleshooting form.